
Adjustable magic loop comes in handy whenever your work starts as a crocheted circle and you do not desire a visible hole in the middle. Examples of such work include coasters, placemats, hats, doilies, rugs, or basket bases. In fact, I use this technique to start all of of my baskets.
In essence, adjustable magic loop allows you to comfortably crochet any number of stitches into a sliding loop rather than into a chain stitch, which is the alternative of starting crochet circles. At the end of the round, you simply tighten the sliding loop to close the gap, creating a center with a barely there or completely invisible hole.
Magic loop, magic circle, adjustable loop, magic ring, adjustable ring, drawstring ring – this fundamental crochet technique goes by many names. Not surprisingly, there are also quite a few ways to execute it and each crocheter has their favorite.
Below you will find my favorite way of creating the adjustable magic loop. I will demonstrate the technique on a basic crochet circle consisting of 6 single crochet stitches.
Step 1.
Cross yarn’s work end over the tail end.

Step 2.
Pointing it away from you, insert hook into the loop you just created.

Step 3.
Yarn over.

Step 4.
Pull yarn through.

Step 5A.
Crochet a chain stitch to secure the magic loop and to raise stitch height for the single crochet stitches of Round 1: yarn over…

Step 5B:
… pull yarn through the loop on the hook.
Chain stitch is complete. It does not count as a stitch.
Magic loop is secured and you are ready to crochet Round 1 stitches into the adjustable loop.

Step 6A.
Work the first single crochet of Round 1:
Insert hook into the magic loop and under the tail end…

Step 6B:
… yarn over…

Step 6C:
… pull yarn though the magic circle loop…
You now have two loops on the hook, and the tail end should be secured between yarn work end and the second loop on the hook.

Step 6D:
… yarn over…

Step 6E:
. …pull yarn through both loops on the hook.
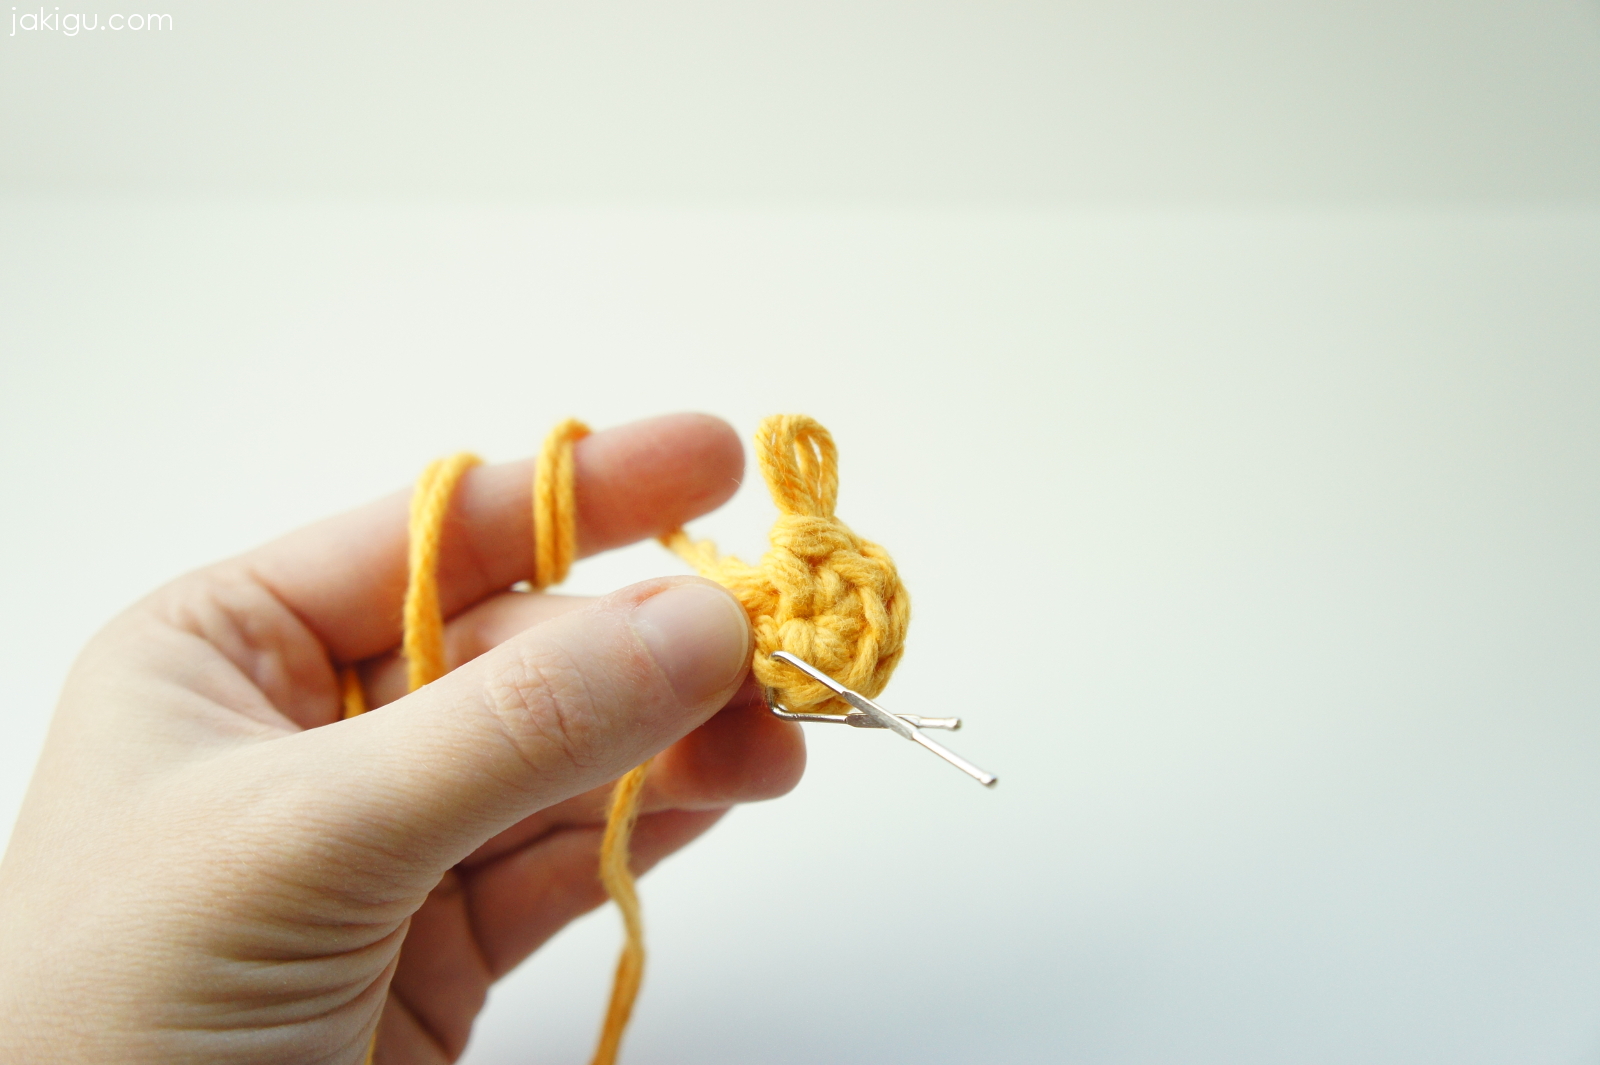
First single crochet of Round 1 is complete. Place a marker into this stitch, if you wish.

Step 7:
Repeat steps 6A – 6E to work the remaining 5 single crochet stitches of Round 1.
Pictured below: completed Round 1. There are 6 single crochet stitches worked into the adjustable loop, the first stitch is clearly marked with a stitch marker, and the end tail is secured under all 6 stitches.

Step 8:
Tighten the adjustable magic loop:
Remove the hook from the last stitch. Hold the post of last single crochet stitch of Round 1 firmly between your right thumb and index finger. Pull on the end tail with fingers of your left hand until the loop space completely disappears.

Step 9:
Round 1 is complete. Magic loop has been tightened so that there is no visible hole in the center of work.
You may join the round at this point, or continue working in continuous spirals depending on your pattern.
What’s your favorite way to start crocheting a circle? Let me know in the comments below.

You may want to explore other tutorials from Learn to Crochet series of blog posts. Or, you may wish to subscribe to receive all new blog posts directly in your Inbox. Just type in your email address below.
You can also follow me on Instagram, Pinterest, and Facebook.
Leave a Comment